Vintage Organizer

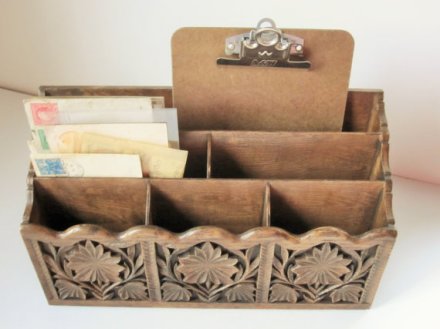
paintI was searching around etsy and came across a vintage organizer exactly like one I have.  It is a plastic, carved, wood toned paper organizer that RetroMama65 is selling for 25 smackers.


il_570xN.615461710_8y6p (570x427)

Huh?  I said.  I really like mine and I was planning on painting it.

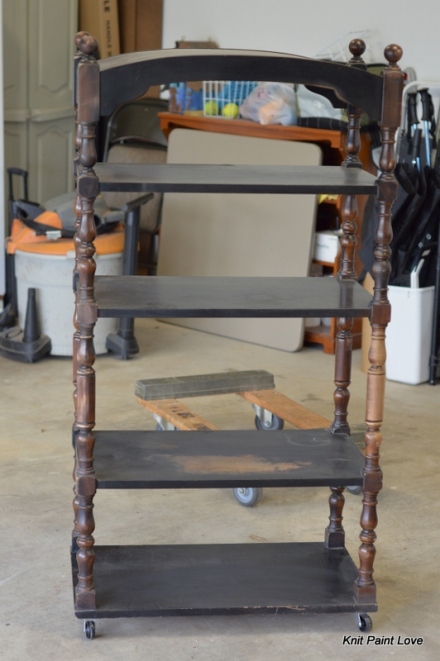
Mine was sitting in the garage, waiting its turn.  See it there on the side next to the boat shelf.  I wish I could remember to take before photos.  Seems like the one I have is a bit darker than retromama65’s.

 DSC_0023

 I finally remembered to paint it with Typewriter MMSMP when I was painting the shelf for the gym.

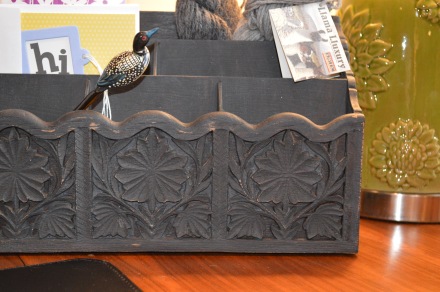
 DSC_0012

I’m pretty happy with the way it came out.

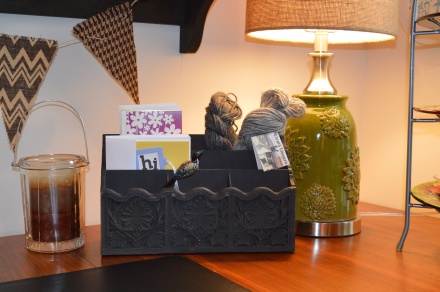
 DSC_0011

 Of course, I had to stuff some yarn in it.  I have it sitting on my project table and if you think it doesn’t have all sorts of things jammed in it already – you are wrong!  I wish I could keep things neat and organized for more than 10 minutes.

Merry Christmas 2014 all!


Furniture Rescue: Bow Topped Shelf

paintI’m lucky enough to have a room on the lower level of my home that we designated as a fitness area –

we call it “the gym”.

It’s the one room in the house that I avoid like the plague.   The gym has a wonderful elliptical machine in it that taunts me each time I walk by.

As I pass by on my way up the stairs, I hear it calling, “Oh, too busy for me, huh?  Word on the street is you would rather be knitting, painting furniture in the garage or digging holes in the garden than spending some time with me.”

“You betcha”, I mutter.

But when I get to the top of the steps, all huffing and puffing, I remember that exercise is the key to fitness, resiliency and stress relief.  If only exercising was the same, as say, watching TV with my slippers on, then maybe I just might start doing it.  Maybe, I just needed to provide a bit of coziness to the activity to make it more appealing.  More slipper friendly.

So, when my FFF had this piece – a hutch top without it’s bottom – I thought this just might be a solution to my problem.

DSC_0004 (1117x1680) (2)

In my life when I need to cozy something up – I add a shelf.

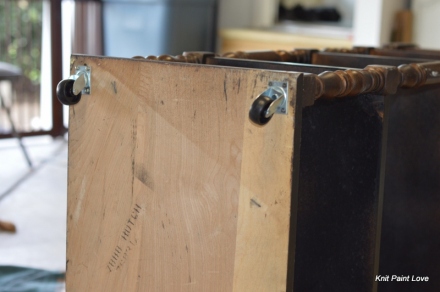
I added some wheels.  To give the piece some height and mobile flexibility.

DSC_0002 (1680x1117) (2)

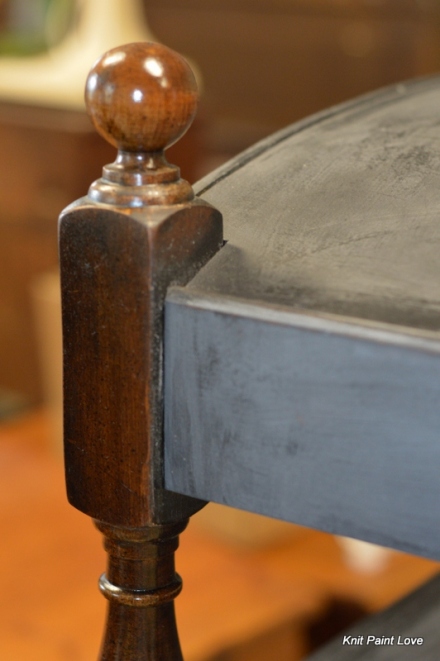
I re-stained the vertical supports and painted the shelf in Miss Mustard Seed’s Typewriter, which always comes out gray for me.

Typewriter always comes out gray for me.

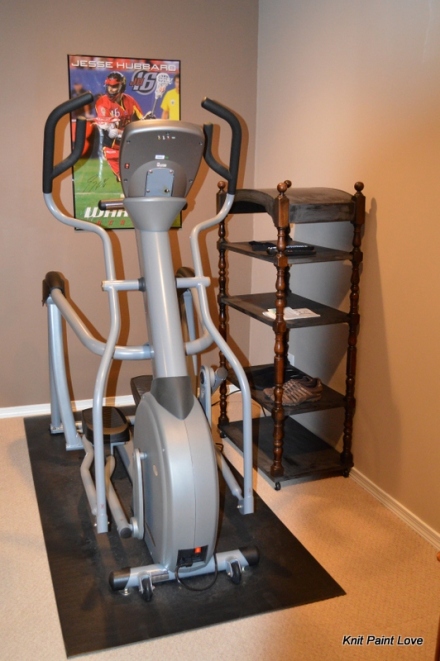
I sealed it with wax and brought it downstairs to sit next to the elliptical monster – I mean machine.

DSC_0008 (1117x1680) (2)

It’s a little shorter than I hoped it would be, but it will work great to house all the creature comforts.  The remotes, the heart rate monitor band, the elliptical manual and the slippers that I can use while exercising on this machine.

So, I have zero excuses left to not use this monster.  I’ll start tomorrow :).

Furniture Rescue: Vanity Chair

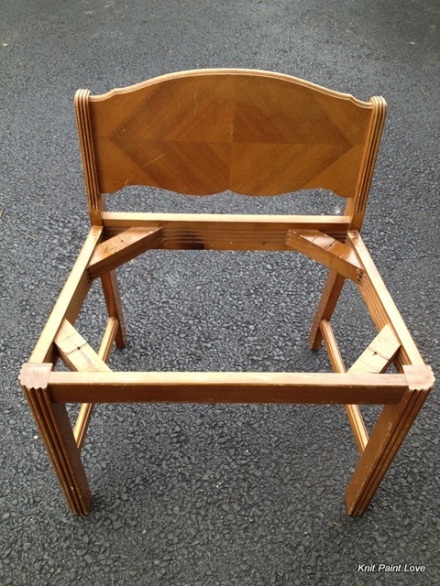
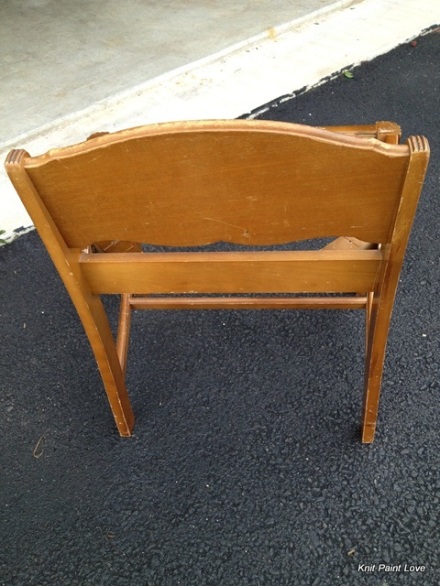
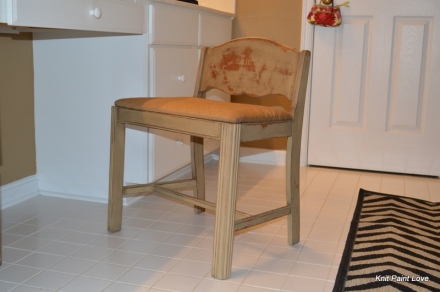
paintI was on the hunt for the elusive perfect vanity chair.  Either the chair was too short, the seat was too small or it was just plain ugly.  My FFF posted this little gem and I just had to give it a try.  It had a low back and a wide seat.

It just might work.

Might see if I can distress enough for the back pattern to show through

I loved the scale of this little chair and the low back.

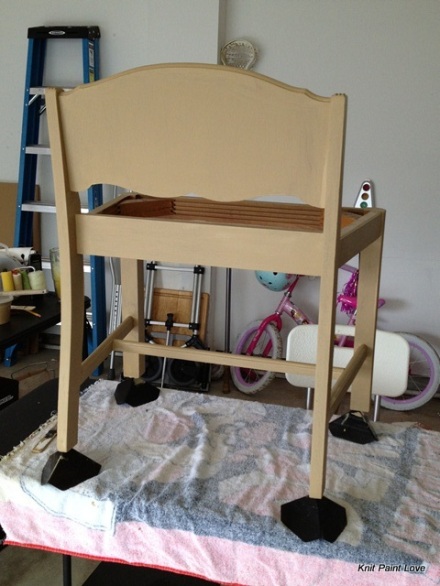
I mixed up a batch of chalk paint using the same color as the walls in the Master Bathroom and started painting.

Waiting for the paint to dry out in the garage

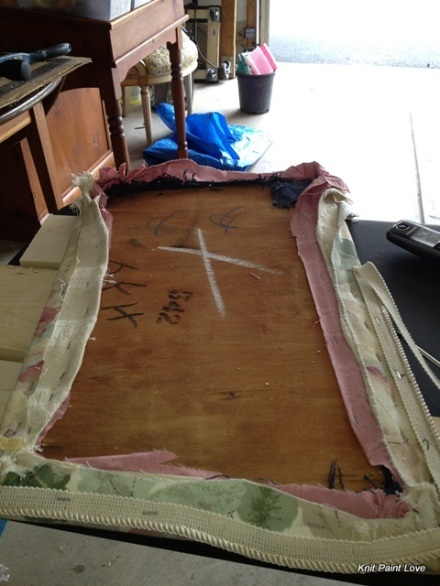
While the paint was drying, I tackled the seat cushion.  This was a well used little vanity chair.  There were no less than four covers stapled over each other on this guy.

Four layers.  I felt like I was peeling back time.

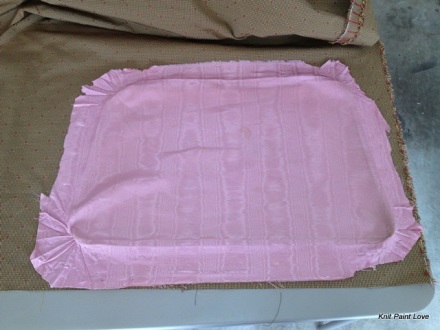
I used the last one as a template for my new fabric.

Cutting out the new fabric

Stapling it on to the seat was pretty easy.  I distressed the paint and this guy was done.

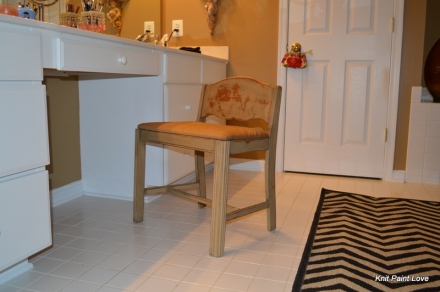
The perfect place to drink coffee and get ready for work.

The chair fits just right in the vanity space.

I think if I can find a set, I’ll add some casters to make the chair a bit taller, but for now I just added some felt pads to the bottoms of the legs, so they don’t scrape the tile floor.

And in case you were wondering, it is sorta weird to see your bathroom on the internet.

Furniture Rescue: Buffet

paintIn the blogland circles I roam [DIY, furniture painting, thrift store make-overs] [Yes, there are more people out there just like me.  Frightening as Lee would say.] [I found my people.  People who get me.] this style of buffet or sideboard is quite popular.

When my FFF [Favorite Furniture Finder – if you’re new to my blog] listed one of these on Craigslist – I was smitten.  Of course, when you buy furniture as an accessory, not a life long commitment, it can get expensive and this piece was out of my budget.  I put in my best offer and kissed this piece goodbye.  I just knew someone would outbid me.  As luck would have it, my FFF called and said she wanted it out of her unit and I could have it.

 Yippppeee!

Now, I wasn’t a fan of the original wood finish.  Something about all those different wood tones, it made me a little nervous.  I needed calm. [Note:  That’s the chandelier in the corner of the pic!]

That's alotta wow.

So, I decided on a safe black finish.  Why?  Because Martha Stewart has a room in one of her many, many homes that I want to use as inspiration for my dining room.

Martha Stewart's Living Room in one of her many homes.

I stopped in my tracks when I saw this room.  Pink ceiling and all.  This is exactly the inspriation I needed to make my crazy idea work. Martha’s room has pale yellow walls and a pink tinged chandelier.  I have pale yellow walls and a pink crystal chandelier I bought from my FFF.  Sometimes I buy something and then say, “WTF did I just do”. But, usually there is a reason when my gut tells me to seize the opportunity.

Notice Martha has a black painted piece in her room, probably to anchor all the pastels.  Now I have a piece that will be the anchor.  Black it is.

Once you know what the plan is for a piece, the rest is easy.

Sanding is the sucky part.

I sanded to roughen the surface.  Stripped and sanded the top, because I’m going to stain it instead of paint it.

Painting is the easy part

Started painting.  With latex this time.  Not milk paint.

Waiting for the paint to dry is the boring part

Waited for the paint to dry.

Freshly stained dark walnut top.  I can stare at that forever.

Stained the top and put the piece in my living room until I can start the redecorating of the dining room.

Wowza.

I re-used the original hardware on this piece for now.  I think it blends in well, but maybe something better will work later.

Distressed edges.  Oh yeah.

I just love the way it turned out.

My favorite part of the piece is this decorative trim.

I may line the tray with felt.

I lined the drawers with a music patterned wrapping paper.

Hello drawers

Happy Thanksgiving!

Already put the top to use to display the Thanksgiving Carolers.

Another one done.

Now I just need to find someone to hang that crystal chandelier and paint the ceiling light pink and not call me crazy at the same time.

Wish me luck.

Furniture Rescue: Drop Leaf Secretary Desk

paintTransforming a piece of furniture is like therapy for me.  I think I try to sand all the grief and regrets from my mind and paint over all the things I’d like to do over.  When I’m done with a piece of furniture, I feel like I’ve been put through an emotional wringer.  And I do this to relax!

It is sort of stressful to stare down a piece of furniture that’s had a tough life.   Like this girl for instance.

Original Finish on the Secretary

Someone tried to love her.  They really did, but she could be so much better.  She deserves better.

Dino agrees.  He LOVES furniture restoration days and doesn’t miss a chance to be out in the garage with me with Pandora on the radio.  Sanding dust floating around.  He watches the birds fly by and breathes in the outside air.

I wish he could help me make the decisions about how to fix her up though.

Original Finish on the Interior of the Secretary

She’s got potential.  I don’t even mind the turquoise color – it’s too bad the finish wasn’t executed very well.  There are lots of drip marks.  The hardware needs to be fixed and cleaned as well.

I decided to sand the surface a bit to remove the top coat drips and have a smooth surface for the paint to adhere.  I used MissMustardSeed’s Milk Paint.  Grain Sack for the exterior and Artissimo for the interior.  I was hoping this would be a good palette for allowing the original color to peek through the distressing.

I didn’t take any progress photos, because I was in a zone and before I knew it – I was done.

Chippy paint and distressed edges.  Just my style.

My favorite picture

Dark Blue Interior with the Turquoise Under Layer

Other side.  Paint didn't chip as much.

Hardware was fixed and cleaned

She's ready for her close-up

The milk paint chipped just like it’s supposed to and I distressed the edges with a sanding block to expose the original finish.  The grainsack color is outside my comfort zone.  I usually go for darker colors, but I am so happy with how this piece came out.  I love that the turquoise is coming through the navy blue on the inside.  I added some glass knobs I picked up at Home Depot.  To me they look like sparkly jewelry and dresses up the distressed finish.  Like jeans and a tee-shirt paired with diamonds.

Chevron patterned paper lines the drawers

 I lined the drawers with a gray and white chevron wrapping paper.

I love her and I’m glad she was there for me when I needed to zone out and try to work through all the things rattling around in my head.

Furniture Rescue: Big Ass End Tables

paintMy FFF [Favorite Furniture Finder] sells quite a few sets of end tables.  I had my eye on a set listed on Craigslist and when I called, I learned I just missed them.  The  new owner was driving off with them as we spoke.

 As luck would have it, my FFF had another set that I might be interested in, so I swung by the mini storage and snapped these up.

You're gonna look great painted!

End tables with great possibility

They are big.  26″ square and had details that I knew would look great when painted.  As with all projects on my very long list, they sat in the garage all summer.  But, once I decided to use Miss Mustard Seed’s Milk Paint in Shutter Gray, I couldn’t wait to get started.

When using milk paint, there isn’t much prep work to do.  I cleaned the tables with a damp cloth, mixed the paint and slathered it on.

Painted and sanded

Nothing like a Dino photo bomb.

Dino is always underfoot.  Loves to work in the garage with me.

When the paint was dry, I sanded to a smooth finish and lightly distressed the edges and then waxed the entire piece, which creates a strong, bonded finish that feels like butter when you run your hand over it.

It is the smoothest surface I have ever felt.

Watching the wax dry

I cleaned the original hardware and reinstalled it.  Buffed the dried wax surface and lined the drawers with a wallpaper I found at the Goodwill.

Wallpaper drawer liner

I placed them in the family room [for now].

The hardware cleaned up real well.  We see you Dino.

Finished end table placed in the family room

The best part about these end tables is the back is completely finished so they can sit in the middle of the room and the back side of the end tables are just as pretty as the fronts.

Back side of the end tables

Thrift Store Make-Over: A Boat Shelf

paintSince my shelf fetish has already been disclosed on this blog,  I can move on to my next shelf project.  I found this boat shelf at my favorite Goodwill store for $4.97.  I recognized it as a wood piece from the old Total Crafts store.  I’m a crafter from way back, and before there was Michael’s, there was Total Crafts.  I bought the shelf thinking I would paint it.  It sat in the garage for many months and I finally started on it after my blue milk paint arrived in the mail.

The boat shelf was a mix of light stained wood and blue paint.

DSC_0023 (532x800)

I thought it would blend in better with other wood tones in my house if it were a darker stain.  So, I stripped and sanded the light finish off and re-stained it in Minwax’s Dark Walnut.

DSC_0030 (532x800) DSC_0031 (532x800)

I then painted the small drawer and the sides of the interior in MissMustardSeed’s new blue color Artissmo.  Artissmo is almost the same color that was originally painted on the boat shelf.

DSC_0040 (532x800) DSC_0039 (800x532)

Watching paint dry is one of my hobbies.  Yours too?

DSC_0041 (800x532)

Once the milk paint was dry, I distressed the edges and sealed it with furniture wax.

I found a compass knob for the drawer.  To install it, I just drilled a hole in the center of the drawer.

DSC_0069

She’s all done!

Boat shelf installed

Finally, a place to put all of Lee’s light houses.

Furniture Rescue: Bar Stools

paintI have a bar area in the basement that we rarely use.  I figured if there were chairs to sit on perhaps we would use it more often.  So, I logged on to Craig’s List to see what my FFF had for sale.  What’s an FFF?

Some people have a BBF.  I have an FFF.  My Favorite Furniture Finder.

She knows who she is and she knows what I like.  Tonight she is dropping off a cathedral shaped cabinet that was too big to fit in my SUV.  Just wait.  I’ll take pictures of it soon.

My FFF had these two bar stools from Poland listed for sale.  If these stools could talk, right?

I liked the bentwood detail under the seat, so I took them home with me.  I had plans.

Bar stools all the way from PolandBack view.  I liked the fan detail.

I thought the stools would look best in a sleek black color.  I took the seat cushions off.

These seat covers have heard it all.

I mixed some satin black paint with 2 tablespoons of un-sanded grout to make a chalk paint and started painting.

All painted.

As I was painting, I thought some of the details would get lost if the chair was all black, so I left the bentwood detail under the seat and the fan back unpainted.  Since the original stain on the wood was a bit red, I found a stripe that had both red and black stripes along with a bit of green to blend with other colors in the basement.  If I get tired of the stripe, I can just re-staple new fabric on the seats.

Here they are in their new home.

Ready for some fun! Please sit on me! We're ready for some a-c-t-i-o-n

  So far, no one has sat on them yet.

But, the bar area looks a bit better with a pair of stools ready for some a-c-t-i-o-n.

Those Frappuccino bottles are so darn CUTE

Things I've Painted

Some people collect cows, erasers, mechanical pencils, hallmark miniature ornaments before they discontinued them, miniature chairs, Byer’s Choice Caroler dolls, yarn, or corks.

I collect Starbucks Frappuccino bottles.  Well, I drink Frappuccino’s and then can’t throw the bottles away.  They’re so darn cute.

What to do with them?

Take a quick look on Pinterest to see what others have done with those little bottles.  Quick my ass.  Pinterest is like crack.  Time EVAPORATES on Pinterest.  It’s like a black hole of “someday I’ll have enough time to do that – might as well pin it.”  Yeah, right.

I digress.

Hmmm.  I have an idea.  An actual original thought not lifted inspired by another blog or pinterest.  What if I re-created this spice-carousel-turned-craft-gadget-holder with Starbucks bottles!?!

Spice carousel turned gadget holder

I was given this carousel years ago and recently painted it with Miss Mustard Seed’s milk paint in typewriter.  I distressed the edges to let the original finish show through and I was in love.  So, how hard could it be to make one just like this, but bigger?

I measured the 1 x 3 wood on the tiled kitchen floor.

Measured out the side pieces.

Had Lee cut it on a sheet over the kitchen tiled floor.  Lee works best barefooted.  Even around saws.  Don’t try this at home.

Toes optional.

This project prompted the purchase of our new Hitachi 12″ compound miter saw.  Oh yeah!  Love this thing, although I’m a little afraid of it.

Just sayin’.

I don’t think you’re supposed to use it with your eyes closed.  Must be a girl thing.

Hitachi Miter Saw.  Oh my.

I traced out the holes for the bottles and drilled them with a hole bit attached to the drill.  This project also prompted the discussion of buying a drill press.  Maybe next project.  A girl has to try.

Traced out holes for bottles

That’s a lot of holes.  The top and bottom were cut.  All were sanded.

Done.  Everything is cut and sanded.

Now, on to assembly.  I stood the bottle holder side pieces on the bottom piece until they were in the correct spots to hold the bottles. And, we simply Gorilla glued the bottle holder sides to the bottom and top pieces and we were done.  I found a lazy susan swiveler online and my mom stopped by and picked it up for me at Home Depot.  I attached it to the bottom of the unit and the hard part was over.

I then stained the piece in dark walnut hoping to mimic the finish on the mini-me spice carousel. Once the stain was dry, I painted it with Miss Mustard Seed’s milk paint in typewriter and filled the bottles with all kinds of craft crap.

Ta daaaa.

Oh it's done.

Swivels and everything.

Thrift Store Make-Over: Framed Chalkboard

paintOne of my favorite thrift stores, The Treasure Hound, is run by the rescue group, Friends of Homeless Animals [FOHA].  We’ve been  short-term fosters with FOHA since April, 2013 and we love it.  The Treasure Hound is located close to where I live, so it’s easy to stop by and peruse the loot.

I couldn’t resist this round, gold frame found on one trip.  For just a couple of bucks, it was coming home with me.

Round Frame from The Treasure Hound

I decided to make a chalkboard out of it.  Hany, my brother-in-law, cut a circle with my new jigsaw out of some melamine board that Lee had in the garage.

Back side of frame

I painted the smooth side of the board with Martha Stewart’s Multi-surface Chalkboard acrylic paint.  I painted on about three coats and when it was dry, primed it by rubbing the flat side of the chalk against the board.  I popped the board into the frame and this project was done.  Now I just need to figure out where to hang it.  The side of the chalk may have scratched the painted surface, so I may need to paint on another coat of paint and prime more gently next time.

Finished frame.  Perfect for a quick message

I just love the small, round frame  – it’s great for a short and sweet message.