Thrift Store Make Over: Cork Trivet

loveI love shopping at Goodwill.  I always find something that I can use or re-purpose.  My family is trained – if we pass a Goodwill, I’m going in REAL quick.

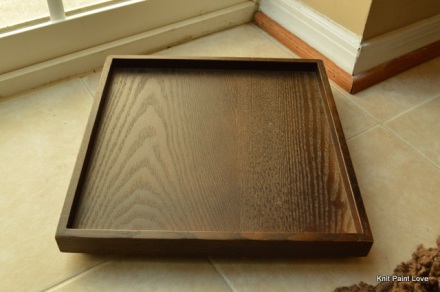
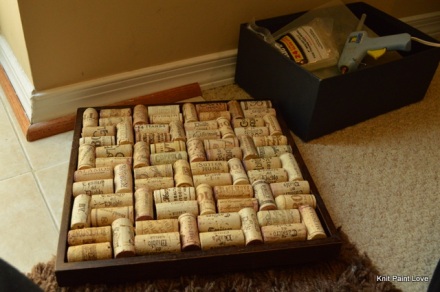
I found this wooden tray and it sat in my studio for a LONG time.  Way too long.  In my way long.  So, today, I finally fixed it up.

DSC_0004

My studio is in my basement and there is a sliding glass door with steps that lead to the backyard.  This is the best spot for natural light, so my pictures are often taken here.  This guy is on the floor basking in the light.

DSC_0005

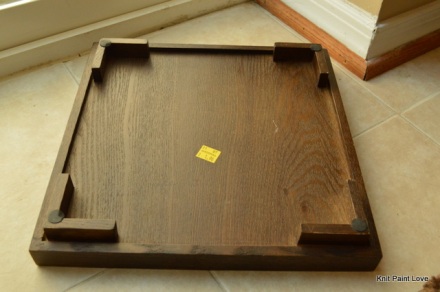
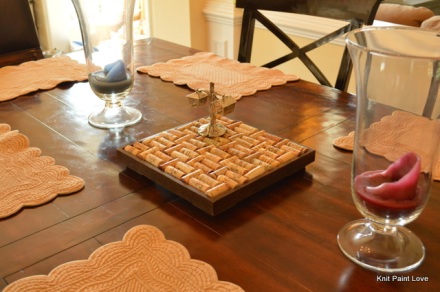
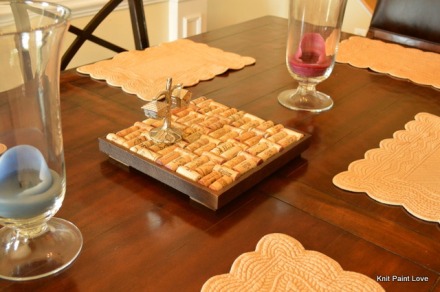
$1.96 not to bad a price for this tray.  My intent was to make it into a cork trivet for my kitchen table.  The table is wood and I am forever screaming, “don’t put hot things on the table you’re gonna wreck it.”  Eloquent, aren’t I?

DSC_0007

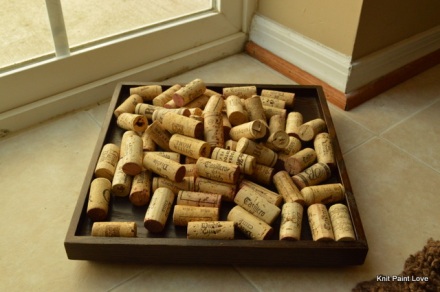
Corks from my cork stash.  I wish I could say I drank that wine.  Wine drinking seems so adult and cool.  Wine is a collector’s dream….all those types, labels, colors and bottles.  Spreadsheets could even be made cataloging your collection and I can’t stand the stuff.  Tastes like jet fuel.  Oh and I keep trying it too.  Hoping my “tastes” will change.  47 years later no luck.  So my cork saving team sends me their corks and I use them in all sorts of ways.

DSC_0008

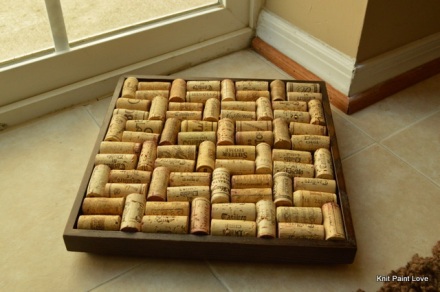
Pattern works.  Ready to hot glue.

DSC_0009

All glued.

DSC_0010 DSC_0011

Ready for some hot stuff.  Looks like I could use some new candles.

Fence Boards: Tool Boxes

love

Second Project

I couldn’t wait to start making the tool boxes with the old fence boards I mentioned in this post.  I had all the materials I needed except for the handles.

Fence Boards ready to be tool boxes

Donna of Funky Junk Interiors used a vintage drill press for her handle and I didn’t have anything like that on hand, so I figured a small tree branch would have to do.

Funky Junk Interiors inspiration toolbox

My roommate [aka my mother] wanted to hit a few yard sales last Saturday with Dino and Markey.  Two dogs at a yard sales is not a good idea, but this yard sale was close to home and it turns out was in a cul-de-sac with a wooded area.  So, one dog went with me hunting for a stick and one dog went with my mom hunting for treasures.

Dino and I found a great branch with an intertwined vine that I’m hoping is not poison ivy.

Branch from woods

Markey and my mom found a mirrored backed display case ($4) and a sun tea jar with no handle ($1).

Mom, Dino [brown], Markey [Gray] and yard sale treasures

Mom, Dino [brown], Markey [Gray] and yard sale treasures

Ready to make it.  I measured and cut the boards to make a long tool box with tapered sides.  I used a piece of deck wood for the bottom, since it wouldn’t be seen and I didn’t want to waste my old wood.  Lee jig-sawed the ends to narrow down the wood side pieces.

My brother was visiting, so he helped Lee with drilling the holes for the handles with a hole bit attached to the drill.  Nothing like putting your brother to work when he visits.

Lee and Bill making it happen

We threaded the tree branch through the holes in the side pieces.  Done!  Just in time for dinner, so I didn’t get a chance to decorate it properly and then I was told to “move my artwork off the table”, so we can eat dinner.  I’m pretty sure this is my house, but some days I’m not so sure.

Long tool box done.  Told to remove it for pending dinner.

Since I had a few board pieces left,  I wanted to make two smaller tool boxes.  It sure was  easier the second time around.  Lee cut the wood and drilled the side holes.  This time in flip flops.  Think maybe we should get a drill press now, huh?

Lee drilling holes in driveway in flip flops.  Don't do this!

Lee drilling holes in driveway in flip flops. Don’t do this!

Lee and I assembled the first one, then he disappeared, because the Redskins game was starting. The nerve!  We’re in the middle of a project.  It came out pretty good though.  I even tried to decorate it this time.  Insert plant from counter.

Tool box Lee and I assembled.

Tool box Lee and I assembled.

My mom and I assembled the second smaller one.  We were running low on tree branch parts, so we stuffed all the smaller branch pieces we had through the holes and wrapped twine around the branches to hold them together.  Not bad.  I stuffed it with my milk paint and brushes.  That’s decoration to me!

Tool box my Mom and I assembled

Tool box my Mom and I assembled

Dino and I walked the meadow and cut some flowering “wild flowers” to finally decorate the long tool box.

Long tool box with wildflowers

Old fence boards and wild flowers from the meadow.  All in a day’s work.

Fence Boards: Shelf

In the wooloveds, there was an old fence post that had some fence boards barely attached to it.  This small section of fence would have been demolished by the road crews that were building a new road by my house.  So, with my Mom in tow, we sneaked over there and saved the doomed boards.  Two things I noticed right away.  Fence boards are heavy and they are dirty.  Not exactly the kind of thing you want in your truck.  But, I was able to get three long boards and one short one.

The boards sat in the driveway for quite some time before inspiration arrived via Donna of Funky Junk Interiors.  She built adorable tool boxes from old wood and I have to try to make them with my wood boards.  I also wanted to make a shelf for my studio and add hooks to the small board.  Finally, I had all the inspiration.

Lee power washed the boards to take off the grime and the rotted parts of the boards, so I am ready to start.

First Project

My studio is my favorite place to hang out.  I am surrounded by all the things that make me happy.  And I am constantly reminded by those that I live with that there are A LOT of things that make me happy, but I can’t help it.  When you’re inspired by the creative side of life, you tend to gather lots of stuff.  But, even I can get overwhelmed at times.

So, I attempted to tackle just one area of my studio.  This area.

Desktop disaster

I know.

This part of my desk  is where I process my paperwork and tack up not only inspiration for future projects, but also things I need to take care.  It’s become a bit unmanageable.  I need to get some things off the desk top.

And in my life – when all else fails –  I just add a shelf.

I bought the shelf brackets at Home Depot, so I just needed to cut the fence board, add the brackets and hang it.  Pretty simple project.

Fence board shelf

Close-up of fence board.  I hope termites don't live in it.

Much better.  Let’s see how long I can keep the desk top clean.  I’m guessing 10-15 minutes.

Next up…the tool box.

The Unpaper Towel

love

The Seasoned Homemaker posted about an UnPaper Towel she made and I was instantly attracted to the colorful, serged edges of the re-usable “paper” towel and thought these towels would be fun to make and possibly use as a gift.  Wishful thinking as parting with the things I make is not one of my strengths.

Damn!  Another entry to the “Make before I Die” to-do list.  Just want I needed.

Bought the fabric from fabric.com.  Cut the fabric as described.  Pretty ambitious stack of rectangles from three yards of fabric.  Why only do one yard, when three yards would be so much better [which will be a common theme on this blog]?

UnPaper Towel - Cut rectangles

Now, since I don’t have a serger.  I thought maybe I could just add a colorful bias tape to seal off the raw edges.  I pulled out my bias tape from the depths of my sewing supplies.  Supplies that were provided by the much loved, but long gone ladies of my past.  I thought I could honor my Grandmother by using her bias tape from 1951 when it only cost $.15.

UnPaper Towel - Bias Tape from the 1950's

This is where things went horribly wrong.

UnPaper Towel - Is this going to work?

For all you sewers out there, please stop laughing.

Unpaper Towel - failed attempt at sewing on bias tape

As you can see, I was determined.  This actually took quite some time.  Stop laughing.  At least at this point, I knew this wasn’t going to work and I had no idea how to apply bias tape, but I am going to reuse that bright yellow 60+ year old tape – by golly.  Somehow, it will make an appearance on this blog again.  Mark my words.

So, plan B.

The Seasoned Homemaker said if you don’t have a serger.  You could just do a simple fold over 1/4″ hem.  Should I try this now?  Yes, I think I will.

UnPaper Towel - Seamed edge approach

I sewed two seams to make it look a bit more sturdy and add more color.

UnPaper Towels - two done with seamed edge

Two done.

UnPaper Towels - Six done

Six done.  If I finish one a night, I might be done with the stack when hell freezes over.   Now, there was a request from my mother, who lives in the same house I do and has taken over the kitchen.

“Could I have one?”

“Mom, don’t you know I make things just to pet them – they are not for actual use.  Oh alright.  I guess you can have one.  Which color?”

“Orange, she says.”

“Don’t get it dirty Mom”

15 minutes later….

Seriously

“Seriously Mom?  Don’t think you’re getting another one.”

P.S.  The Seasoned Homemaker just days after my bias tape debacle posted this great post about how to sew on bias tape.  And another one on how to make your own bias tape.  She’s a genius.